¶ What You Can Do In The Piano Roll
In the Piano Roll, you can primarily do the following:
- Input and edit musical notes
- Change lyrics and phonemes
- Edit pitch points and curves (Smart Pitch Controls)
- Display waveforms and AI Retakes
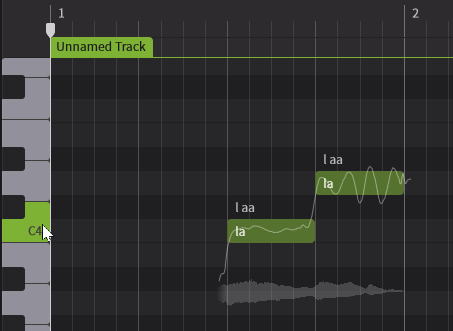
The vertical axis of the Piano Roll represents pitch, while the horizontal axis represents time. Clicking on the keyboard located on the left side of the Piano Roll will play a piano sound, allowing you to confirm the pitch.
Lyrics are displayed inside the notes, while phonemes (pronunciations) are shown above the notes.
¶ Piano Roll Editing Tools
¶ Note Editing Mode (Alt+1/Option+1)
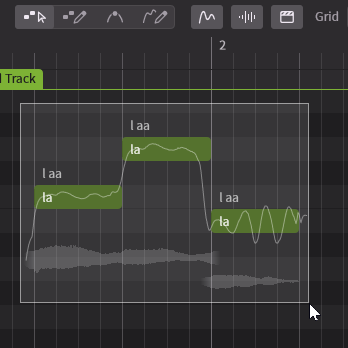
The Note Editing Mode allows for easy selection and movement of notes.
You can also create notes of any desired length by double-clicking at the location where you want to input a note and then dragging.
¶ Note Creation Mode (Alt+2/Option+2)
The Note Creation Mode allows for intuitive note input by dragging the mouse.
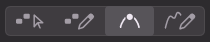
¶ Pitch Control Points Mode (Alt+3/Option+3)
This tool allows you to create and edit Smart Pitch Control Points, which are used for manipulating pitch curves.
¶ Pitch Control Curves Mode (Alt+4/Option+4)
This tool allows you to draw Smart Pitch Control Curves.
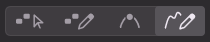
When the Pitch Control Points Mode or Pitch Control Curves Mode is selected, you cannot edit notes or lyrics.
¶ Grid and Snap Settings
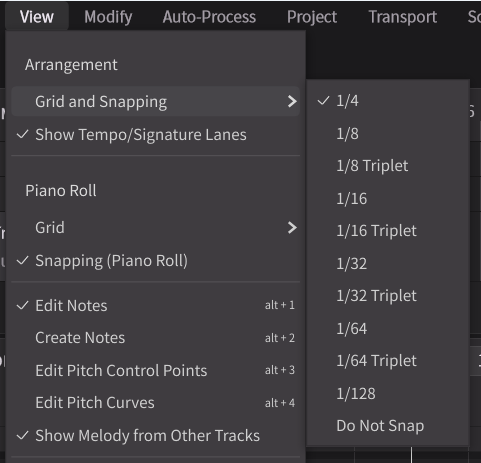
- You can change the width of the displayed grid lines by selecting from the [Grid] dropdown menu.
- Setting the grid to [Adaptative] will automatically change the width of the grid lines according to the zoom level of the piano roll.
- Turning on [Snap Mode] will cause note edges to snap (adhere) to grid lines when creating, moving, or resizing notes.
You can set separate grid sizes for the arrangement and piano roll areas.
¶ Piano Roll Display Settings
¶ Display Pitch Curves, Waveforms, and AI Retakes
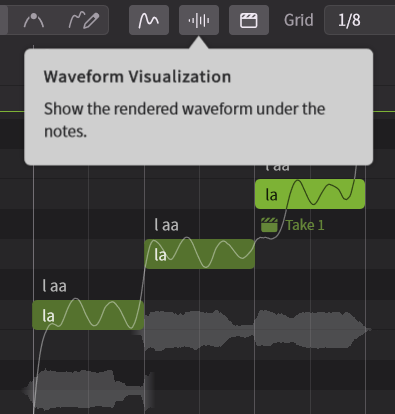
You can toggle the display of rendered pitch curves, waveforms, and AI Retakes widgets from the buttons at the top of the Piano Roll.
The AI Retake widget is only displayed on notes where a retake has been set.
¶ Scale Mode
When you enable [Scale Mode] using the button at the top of the Piano Roll, the keys and background corresponding to the notes in the selected scale will be highlighted.
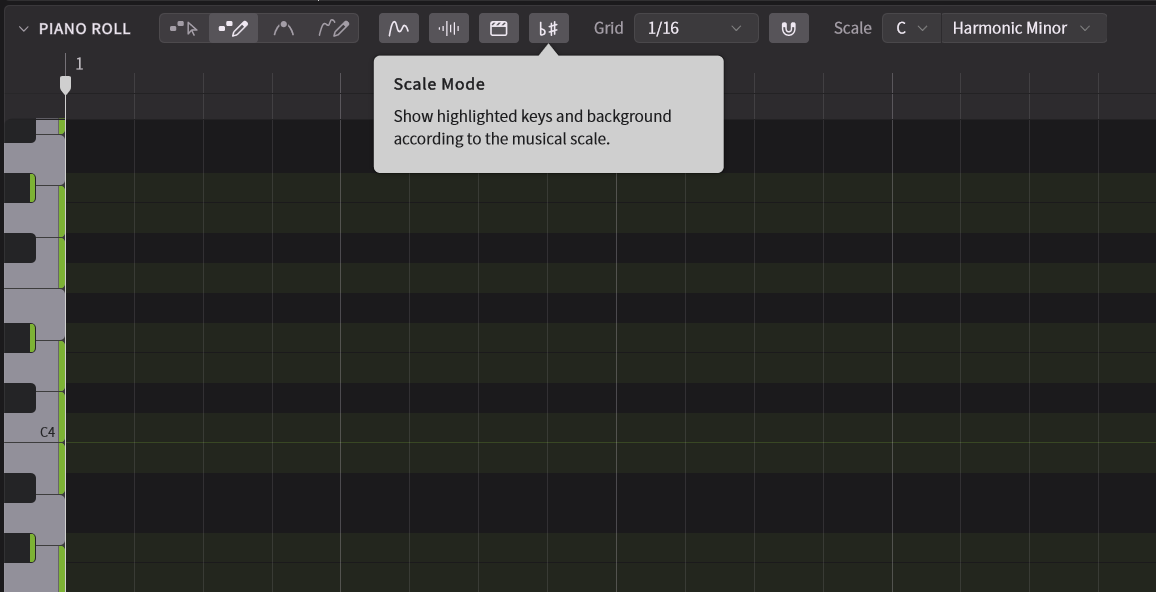
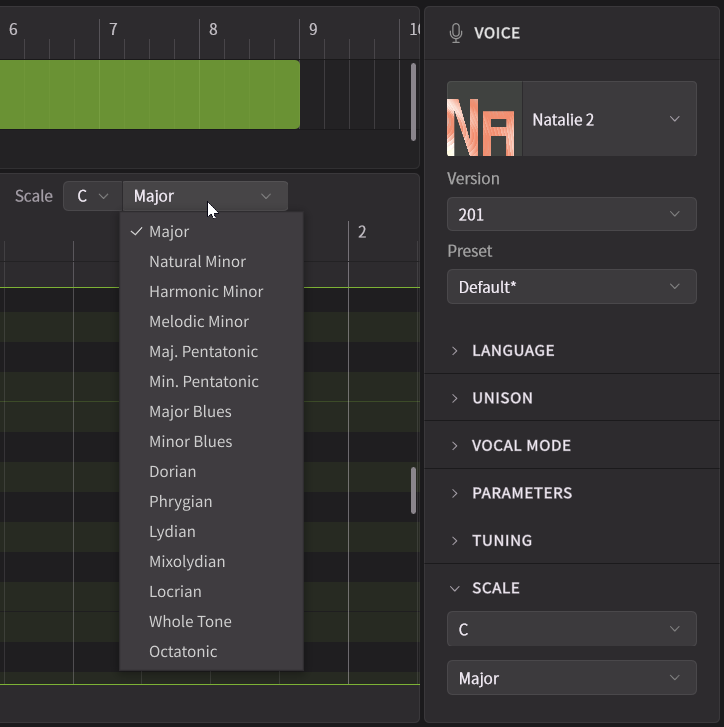
The scale can be selected in the [Scale] section at the top of the Piano Roll or in the Voice Panel.
The scale can be set for each Note Group.
¶ Show the Melody from Other Tracks
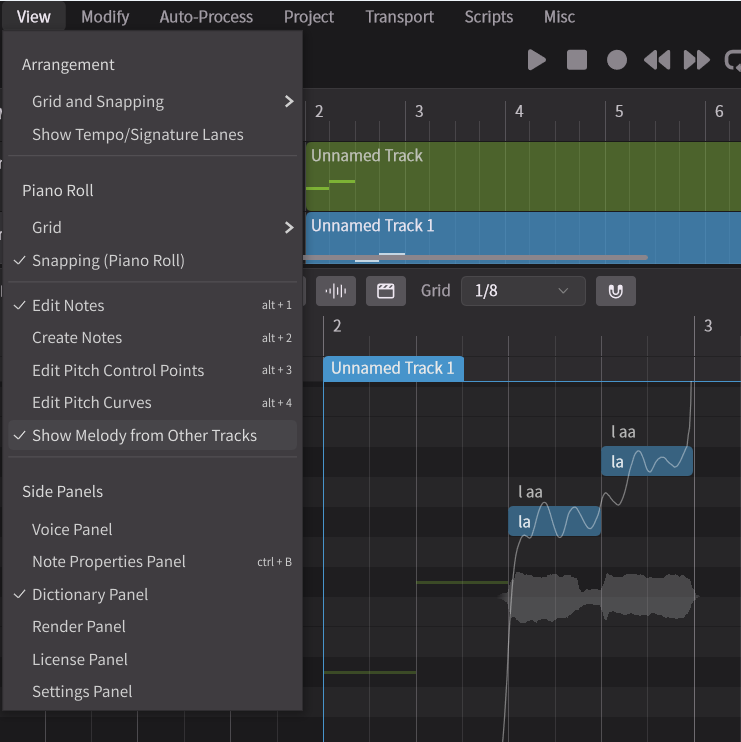
When [View] > [Show Melody from Other Tracks] is checked in the menu bar's menu, notes from tracks that are not currently being edited will be displayed as thin lines in the background of the Piano Roll.
¶ Input and Edit Notes
Notes can be entered and edited with the Note Editing Mode or the Note Creation Mode.
¶ Input Notes
- Using the Note Editing Mode, double-click where you want to create a note.
Drag to adjust the length of the note. - When using the Note Creation Mode, notes are entered at the position where you drag.
- Other methods include recording using a MIDI keyboard, importing MIDI files, and Voice-to-MIDI Conversion, which converts audio data into notes and lyrics.
Please also refer to the "Notes and Lyrics Input" page.
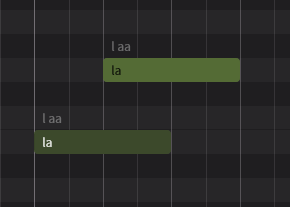
Notes can't be stacked. If you want to create a harmony, enter the notes on a separate track.
¶ Select Notes
- Select notes by clicking on them.
- Using the Note Editing Mode, drag to enclose the notes you want to select.
- Press Tab to select the next note.
- Press Ctrl+Tab / Command+Tab to select the previous note.
- Hold Ctrl/Command or Shift to select multiple notes.
- With notes selected, hold Ctrl/Command and click to add or remove selections.
- When a note is selected, Shift + click on a different note will select all notes in between them.
- Ctrl + A/Command + A selects all choosen on the selected Track.
- Press Esc to cancel the selection.
¶ Move Notes
Move notes by dragging them from the center. If multiple notes are selected, they will be moved together.
¶ Move on Timeline
- Hold Ctrl/Command while dragging to move the selected notes horizontally only.
- Hold Ctrl+Alt/Command+Option while dragging to move notes without snapping to the grid.
¶ Move on Pitch
- Hold Shift while dragging to move the selected notes vertically only.
- Hold Ctrl+Shift/Command+Shift while dragging to adjust microtones in 25 cent increments.
To reset the microtone/detune adjustment, right-click the note you want to reset and select "[Reset] > [Reset Detuned Notes]."
- Hold Ctrl+Alt+Shift/Command+Option+Shift while dragging to move notes vertically without snapping to the grid.
¶ Execute Pitch Changes
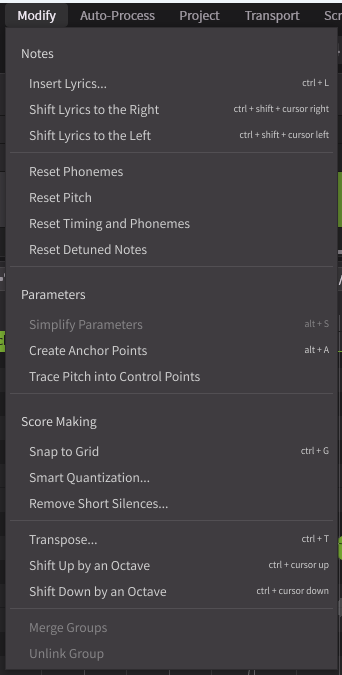
- Click on [Modify] > [Shift Up by an Octave] in the menu bar (or Ctrl+↑/Command+↑) to raise the pitch of the selected notes by one octave.
- On the Menu bar, click [Modify] > [Shift Down by an Octave] (or Ctrl + D/Command + D) to lower the selected notes by one octave.
- Click on [Modify] > [Transpose] in the menu bar (or Ctrl+T/Command+T) to shift the pitch of the selected notes by a specified number of semitones.
¶ Change Length
Change the length of a note by dragging its edge. If multiple notes are selected, their lengths will change together.
¶ Fill Gaps Between Notes
Short gaps between notes can sometimes result in unnatural-sounding phrasing. Here are a few ways to fill those gaps:
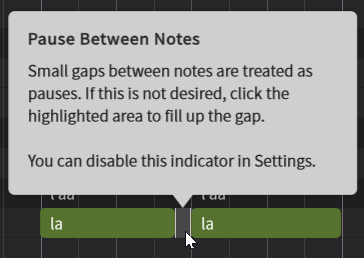
- Note gaps will be highlighted. Clicking on them will extend the previous note to fill the gap.
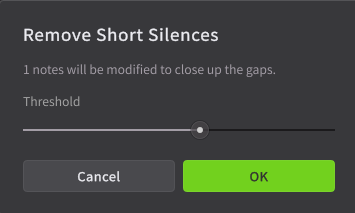
- To fill multiple gaps at once, select the notes and click on [Modify] > [Score Making] > [Remove Short Silences...] in the menu bar. Gaps shorter than the "threshold" value set in the dialog box will be filled.
¶ Align Note Start and End
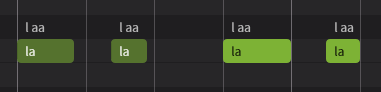
- Click on [Modify] > [Score Making] > [Snap to Grid] in the menu bar (or Ctrl+G/Command+G) to align the edges of selected notes to the nearest grid point.
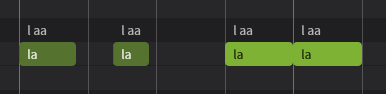
- Click on [Modify] > [Score Making] > [Smart Quantization...] to adjust the timing of selected notes to align with the tempo. The strength of the quantization can be adjusted in the dialog box.
¶ Delete Notes
- Right-click on a note or a selection of notes and select [Delete Selection].
- Select a note and press Delete, or click on [Edit] > [Selection] > [Delete Selection] in the menu bar.
¶ Copy and Paste Notes
- Right-click on a note or selection of notes and select [Copy] (or Ctrl+C/Command+C) to copy the selected note(s) to the clipboard.
- Right-click on a note or selection of notes and select [Cut] (or Ctrl+X/Command+X) to cut the selected note(s) (copying them to the clipboard and deleting them from their current position).
- Right-click on an empty space and select [Paste] (or Ctrl+V/Command+V) to paste the copied notes from the clipboard.
- The [Copy], [Cut], and [Paste] menu options are also available from the [Edit] > [Clipboard] sections in the menu bar.
The first time you paste, you'll be given a choice of paste locations: "Paste at the playhead" or "Paste at the same position on screen".
For more details, see "Settings".
¶ Split Notes
To split a note, right-click on the desired location within the note and select [Split Note].
¶ Merge Notes
To merge notes, select multiple adjacent notes. Then, right-click on the selection and choose [Merge Notes].
¶ Mute Notes
When a note is muted, it will be grayed out and will not be rendered during playback.
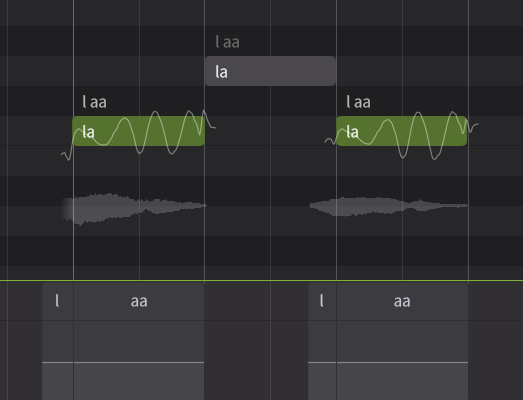
- Right-click on a note that is not muted, and select [Mute Note] (or press Ctrl+M / Command+M) to mute it.
- Right-click on a muted note, and select [Unmute Note] (or press Ctrl+M / Command+M) to unmute it.
¶ Edit Lyrics
Double-click a note to edit its lyrics.
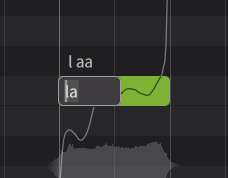
You can do the following actions:
- Press Tab to edit the lyrics of the next note.
- Press Ctrl+Tab to edit the lyrics of the previous note.
- Press Enter / Return to confirm the lyrics.
- Press Esc to cancel lyric editing.
¶ Batch Lyrics Input
You can input lyrics to selected notes in batch. This menu can be accessed in the following ways:
- Select [Modify] > [Notes] > [Insert Lyrics...] from the menu bar.
- Right-click on one of the selected notes and click [Insert Lyrics...].
- Ctrl + L/Command + L to enter lyrics in batch.
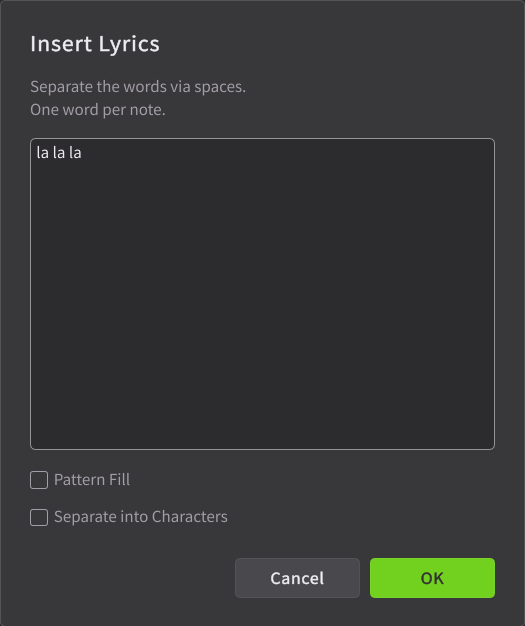
Enter the lyrics into the text box, separated by spaces. Click [Confirm] to assign the lyrics to each note.
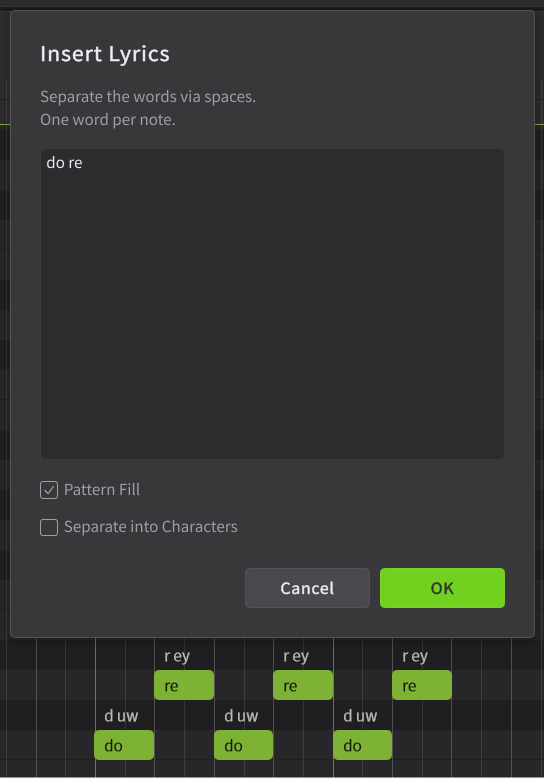
- Checking [Pattern Fill] will repeat the entered lyrics when the number of selected notes exceeds the number of lyrics provided.
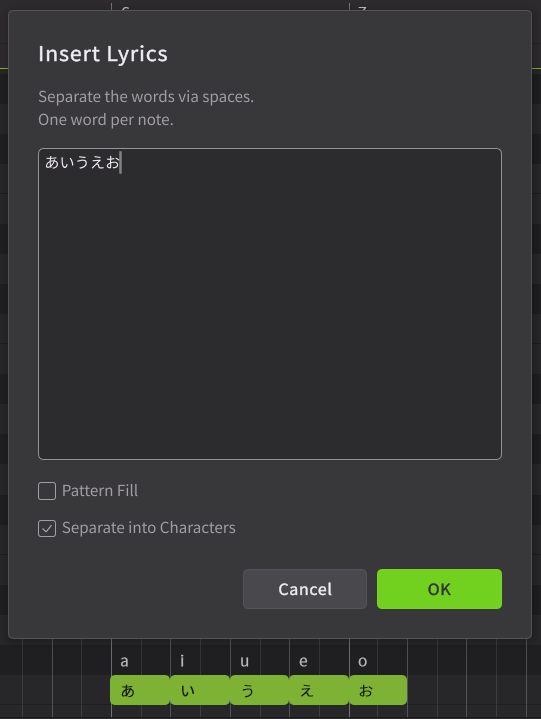
- Checking [Separate into Characters] will input one character per note. This is useful for entering lyrics in Japanese, Chinese, or other languages where individual characters represent syllables or words.
To set the default lyrics for notes, go to the Settings panel and change [Editor] > [Notes] > [Default Lyrics].
¶ Special Symbols in Lyrics
When entering lyrics, you can use the following special symbols.
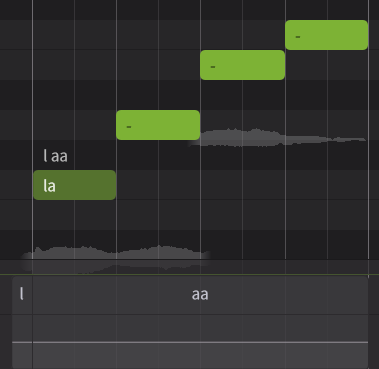
- [ - ]: Continues the previous phoneme.
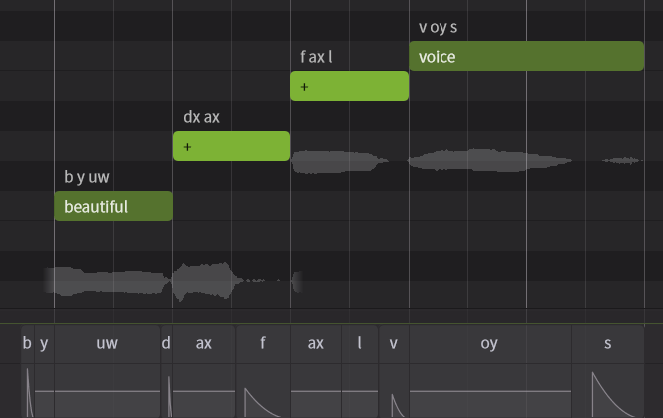
- [ + ]: Splits the syllables of the previous word. For example, the word "beautiful" has three syllables: "beau-ti-ful". By entering "beautiful", "+", and "+" across three notes, you can represent each syllable on a separate note.
- [ br ]: Inserts a breath sound (inhalation).
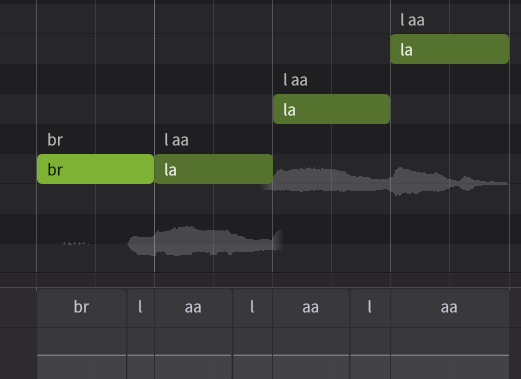
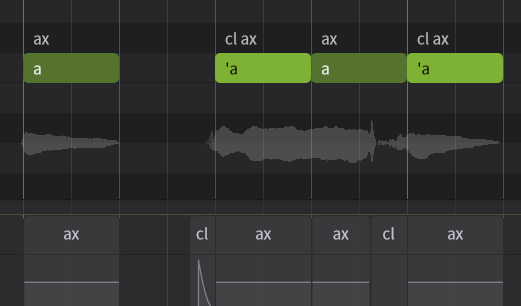
- [ ' (cl) ]: Placing an apostrophe
'before a lyric inserts a glottal stop. This is especially useful when you want to separate a vowel from the previous phoneme.
¶ Shift Lyrics Forward or Backward
If the entered notes and lyrics are misaligned, you can shift the lyrics forward or backward.
¶ Shift Lyrics to the Right
Right-click on a note and select [Shift Lyrics to the Right]. (Or press Ctrl+Shift+→ / Command+Shift+→)
¶ Shift Lyrics to the Left
Right-click on a note and select [Shift Lyrics to the Left]. (Or press Ctrl+Shift+← / Command+Shift+←)
¶ Edit Phonemes
The lyrics entered into a note are converted into phonemes, the smallest units of vocalization, which are then used to render the audio.
Phonemes are displayed above the note and can be edited by double-clicking them.
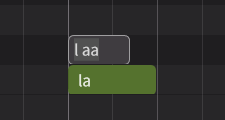
The phonemes available in the editor vary depending on the singing language.
You can check the list of phonemes available for each language in the Phoneme Reference Chart.
You can do the following:
- Press Tab to edit the phonemes of the next note.
- Press Ctrl+Tab / Control+Tab to edit the phonemes of the previous note.
- Press Enter / Return to confirm the phoneme edit.
- Press Esc to cancel phoneme editing.
If you register a combination of lyrics and phonemes in the Dictionary Panel, it can be applied to an entire note group.
For more detailed pronunciation editing, please refer to Editing Phonemes.
¶ Specify Phonemes with Lyrics
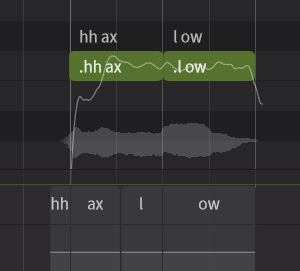
To use the words as phonemes in the lyrics directly, enter "." at the beginning of the words, followed by the phonemes separated by a space.
¶ Reset Phonemes
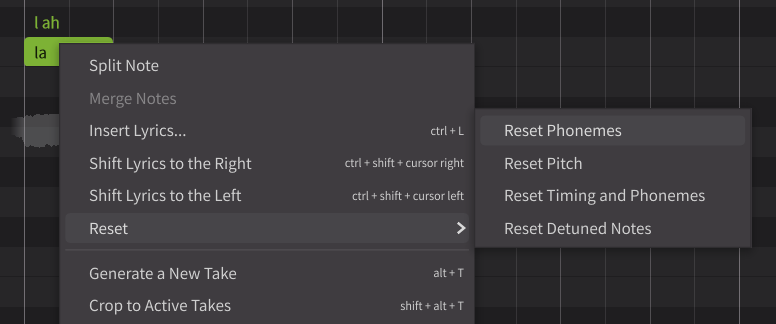
Right-click the note you want to reset, then select [Reset] > [Reset Phonemes].
¶ Smart Pitch Controls
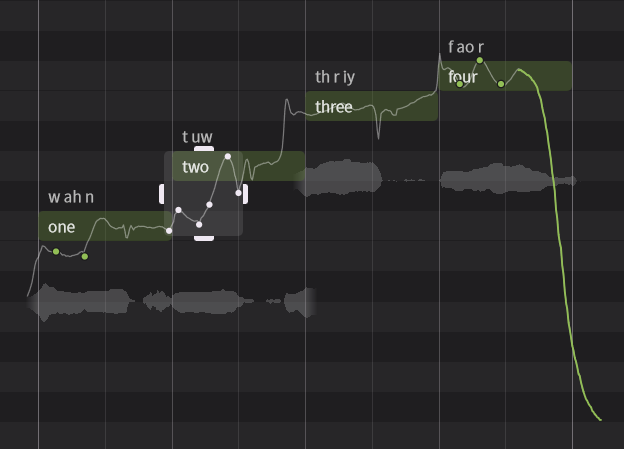
Smart Pitch Controls allows you to intuitively edit pitch using control points and curves.
When Smart Pitch Controls are applied to the Piano Roll, a pitch curve is generated that passes through the specified control points and curves.
For the basics of pitch editing, see Pitch.
¶ Use the Pitch Control Curves Mode
The Pitch Control Curves Mode allows you to create and edit Smart Pitch Control Curves.
- Drag to create a curve.
- Drag over an existing curve to modify it.
- Right-drag with the mouse to erase the curve in the dragged area.
¶ Use the Pitch Control Points Mode
The Pitch Control Points Mode allows you to create and edit Smart Pitch Control Points.
- Double-click to create a control point.
- Click a control point or curve to select it. Selected control points are displayed in white.
- Right-click a control point or curve and select [Delete Selection] to remove it.
- Select a control point or curve and press Delete, or click [Edit] > [Selection] > [Delete Selection] from the menu bar to remove it.
Smart Pitch Control points are not available when using version 1-compatible voices.
¶ Create and Edit Control Points Using the Resize Box
When you drag using the Pitch Control Points Mode, a rectangular resize box appears. Any control points or curves enclosed by the box during the drag will be selected.
Additionally, temporary control points are created along the gray pitch curve.
- Drag the resize box to move the selected control points or curves.
- Drag the white bars on the sides of the resize box to scale the selected control points or curves.
- Click outside the resize box (or press Esc) to dismiss the box and deselect the control points or curves.
- If you dismiss the resize box without moving or scaling the temporary control points, they will be deleted.
Control points and curves that have been moved or scaled will remain after the resize box is dismissed.